If you’ve ever stood in your kitchen mid-jelly-making, staring at a lumpy pot of fruit pulp and wondering why your favorite store-bought jelly is so smooth and spreadable—no bits, no cloudy specks, just that perfect, glossy sheen—chances are a strainer is the unsung hero of the process. As someone who’s spent years sourcing, testing, and refining strainers for home cooks and small-batch jam and jelly makers, I can tell you this: a good strainer isn’t just a tool to catch lumps. It’s the difference between a jelly that turns into a thin, runny mess and one that sets firm, tastes bright, and stays creamy in every bite. Today, I’m walking you through exactly how to use a strainer to make jelly step-by-step, why the right strainer matters, and the little tricks I’ve picked up along the way that turn a good batch into a great one. Strainer

First, let’s clear up a common confusion: jelly isn’t jam. Jam is made by cooking crushed fruit and sugar together, resulting in a thick, fruit-forward spread with visible bits. Jelly, on the other hand, is made from fruit juice, strained to remove all solid pulp, seeds, and even tiny bits of skin that can make it cloudy or prevent it from setting properly. That straining step is where most home cooks go wrong—and where a quality strainer saves the day. I’ve seen people use colanders, paper towels, even coffee filters for straining, and while those work in a pinch, they come with trade-offs. Colanders have wide holes that let small seeds and pulp slip through, leading to lumpy jelly. Paper towels absorb too much of the flavorful juice, leaving your jelly tasting flat. Coffee filters, while great for fine straining, are slow and can tear if you’re straining a warm batch of fruit juice, leading to wasted product. A purpose-built jelly strainer, though, strikes the perfect balance: fine enough to catch every particle, sturdy enough to hold up to the weight of hot juice, and designed to drain quickly so you don’t spend hours waiting for pulp to separate.
Let’s start with the pre-straining steps, because what you do before you even touch a strainer will make the straining process way easier. First, pick your fruit. The best jelly comes from fruit that’s high in pectin—naturally occurring carbs that help jelly set. Citrus (lemons, oranges), apples (especially green apples like Granny Smith), grapes, currants, and cranberries are all excellent choices. If you’re using ripe fruit, which has lower pectin, you can add a commercial pectin or a bit of green apple to boost it, but we’ll stick to natural methods for this guide. Next, prep the fruit: wash it thoroughly, remove any stems, leaves, or bruised spots, and chop it into small pieces. The smaller the pieces, the more juice you’ll extract, which means less time straining and more finished jelly. Then, cook the fruit: put the chopped fruit in a large pot with a small amount of water (usually ¼ to ½ cup per 4 cups of fruit) to soften it. Bring it to a boil, then simmer for 10 to 15 minutes, stirring occasionally, until the fruit is mushy and the juice is released. Don’t overcook it, though—you want the fruit to break down just enough to release juice, not turn into a puree. Overcooking can make the pulp too sticky, which clogs your strainer and slows down drainage.
Now, the main event: straining the juice. This is where your strainer comes into play. First, choose the right strainer for your batch size. For small batches (up to 4 cups of juice), a fine-mesh stainless steel strainer (usually 80-mesh or finer) works great. For larger batches (like 8 cups or more, which is common for canning), a jelly bag strainer is ideal. Jelly bags are made of tightly woven food-grade fabric, usually cotton or nylon, and are designed to hang over a pot so gravity does the work of draining. Stainless steel strainers, on the other hand, are great if you want a more hands-on approach, but be sure to pick one with a fine mesh—coarse mesh (40-mesh) is too wide for jelly, and you’ll end up with bits in your juice.
Whichever strainer you use, here’s the step-by-step process:
- Set up your strainer over a large heatproof bowl. Make sure there’s enough space between the bottom of the strainer and the bowl to let the juice drain freely—if the strainer is too small for your bowl, set it over a measuring cup or a larger pot. If you’re using a jelly bag, tie the top of the bag to a cabinet knob, a sturdy hook, or a stand so it hangs straight, with the bottom of the bag hovering a few inches above a pot to catch juice. I always line my jelly bag with a single layer of cheesecloth for extra insurance—catches even the tiniest seeds and keeps the fabric from getting clogged with thick pulp.
- Carefully pour the warm fruit mixture into the strainer. Don’t dump it all at once—letting it flow slowly will prevent the strainer from getting overloaded. If you’re using a stainless steel strainer, use a rubber spatula to gently press the fruit against the mesh to squeeze out extra juice. Be gentle, though—pressing too hard can force pulp through the mesh, leading to cloudy juice. For a jelly bag, don’t press the pulp at this stage—let it drain on its own. Pressing too early can make the juice cloudy, as it will force small pulp particles through the fabric.
- Let it drain. This is the hardest part—wait at least 2 hours, and preferably overnight, for all the juice to separate. I know, it’s tempting to press the pulp after 30 minutes, but trust me, the extra time is worth it. If you need to speed things up, you can gently squeeze the bottom of the jelly bag after a few hours, but only a little—squeezing too hard will add pulp to your juice. If you’re using a stainless steel strainer, after 1 hour, you can tap the side of the strainer lightly to help juice flow through, but avoid stirring the pulp, which will mix it back into the juice.
- Collect the strained juice. Once the juice is clear and free of pulp, seeds, and skin, you’re ready to move on to cooking the jelly. Discard the pulp—you can compost it, or use it to make fruit compote for yogurt, if you want.
Wait a second—why is the waiting period so important? Let’s get scientific here. Fruit pulp contains pectin, which is what makes jelly set. But pectin molecules bind to water, and when you press the pulp too early, you release those molecules along with tiny bits of pulp that can get trapped in the pectin network, preventing the jelly from setting firmly. The slow drain lets the juice separate from the pulp naturally, so the pectin molecules stay intact and dissolved in the clear juice. That’s why a good strainer, especially a jelly bag, is essential for this step—it provides a barrier that lets only the clear juice pass through, without damaging the pectin or forcing pulp particles through.
I’ve tested dozens of strainers for this exact process, and the biggest mistake I see home cooks make is choosing a strainer that’s too coarse. A 60-mesh strainer will catch most large seeds, but tiny grape seeds or bits of apple skin will slip through, leading to a grainy jelly. An 80-mesh strainer is perfect for most small batches, and a jelly bag with a fine weave is the best for large batches because it doesn’t clog easily and drains evenly. Stainless steel strainers are great because they’re dishwasher-safe, durable, and don’t absorb flavors, which is important if you’re making multiple batches of different fruit jellies.
Another pro tip: if you want extra-clear jelly, strain the juice a second time. After the first drain, pour the juice through your strainer again, or through a coffee filter lined in a strainer. This removes any remaining tiny particles and gives your jelly that glossy, professional look. I do this for small-batch gift jellies, and it makes a huge difference in the final product.
Now, let’s talk about common mistakes to avoid. First, don’t use a strainer that’s too small for your batch. If you’re making 8 cups of fruit, a 6-inch strainer won’t hold all the pulp, and you’ll end up spilling or overloading it, leading to slow drainage. Second, don’t skip softening the fruit before straining. If you try to strain raw fruit, it’s hard, and the juice won’t come out easily, leading to a lumpy, low-yield juice. Third, don’t use paper towels or cheesecloth that’s too thin. Thin cheesecloth will let small seeds slip through, and paper towels will absorb too much juice, leaving you with less finished jelly.
As a strainer supplier, I’ve worked with hundreds of home cooks and small-batch jelly makers, and the number one comment I get is that a quality strainer makes the process so much less stressful. I remember one customer who used to use a coffee filter for straining, and she told me she spent 3 hours straining a single batch of strawberry jelly. When she switched to our 80-mesh stainless steel strainer, the process took 45 minutes, and her jelly was smoother than ever. That’s the thing about a good tool—it doesn’t just make the job easier; it makes the final product better.
Once you’ve strained your juice, the rest of the jelly process is straightforward: mix the strained juice with sugar and lemon juice (to boost acid, which helps pectin set), bring it to a rolling boil, add pectin if needed, and boil until it reaches the jellying point (usually 220°F, or 8°F above the boiling point of water at your altitude). Then pour it into sterilized jars, seal, and process in a water bath canner for 10 minutes. The strained juice is the foundation here—without it, even the best sugar and pectin won’t give you that perfect spreadable jelly.
If you’re just getting started with jelly-making, investing in a good strainer is one of the best decisions you can make. Whether you’re a home cook making small batches for your family or a small business owner scaling up production, the right strainer will cut down on prep time, reduce waste, and give you consistent, high-quality jelly every time.
At our company, we design and test every strainer with jelly-making in mind—from fine-mesh stainless steel strainers perfect for small batches to heavy-duty jelly bags designed for large-scale canning. Each product is made from food-grade materials, easy to clean, and built to last, so you can use it for years of jelly-making.
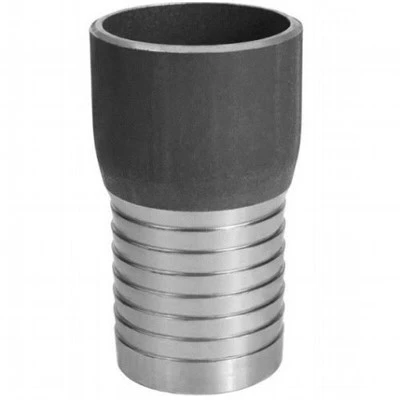
If you’re ready to upgrade your jelly-making tools, or have questions about which strainer is right for your needs, we encourage you to reach out and connect with our team. We’re here to help you find the perfect strainer for your process, whether you’re a beginner or a seasoned pro.
Guillemin Coupling References:
- “Complete Guide to Home Canning,” United States Department of Agriculture, 2023.
- “Pectin Functionality in Fruit Preserves,” Journal of Food Science, Vol. 85, No. 12, 2020.
- “Small-Batch Jam and Jelly Making,” Ball Publishing, 2022.
Suzhou Fuyikang Metal Industrial Co., Ltd.
As one of the most professional strainer manufacturers and suppliers in China, we have world-leading production equipment and strong manufacturing capabilities. We warmly welcome you to buy bulk high quality strainer for sale here from our factory.
Address: No.26.Mudong Rd,Mudu Town, Wuzhong Distric, Suzhou City,Jiangsu Province,China
E-mail: SZFYK@SZFUYIKANG-COUPLING.COM
WebSite: https://www.fyk-coupling.com/
